Wednesday, June 28, 2017

Beach Themed Easy Tag Tutorial

Tag Tutorial for Cherish The Memory : Romantic Summer  


You can find beautiful paper crafting kits at Cherish the Memory's Etsy page here.


This tag was very fun, easy, and quick to make! I typically have a tendency to overdo simple projects and turn them into complicated and intricate ones, but a nice simple project can be a breath of fresh air and when that is needed, nothing can be better than a tag! Tags are perfect for anyone and any occasion. I like to use tags for small gestures or situations in which cards would be too much. A tag is also an excellent way to limit yourself to a small space and will also help you not get anxious over having to cover large spaces, such as that of a canvas.

The materials you will need :


A plain tag 


Raffia and this gorgeous Washi Tape from Cherish the Memory Etsy Store


Creative Embellishments Fence Chipboard or any chipboard fence of your choice (optional)


Tutorial


I attached the raffia through the loop hole and affixed the background from the Romantic Summer Paper Card Kit down with the gold washi. I used the washi to cover the rest of the tag background and affixed the chipboard with mounting tape and craft glue. *The pictures are a bit different because I was indecisive and was experimenting with washi placement* 


Some natural fibers were tucked under the fence. 


Here I decided to add some gold ribbon to the raffia but you can use whatever other color you wish or just add more raffia! You can also see how I continued to over the tag with more washi to make a connection with the gold ribbon.


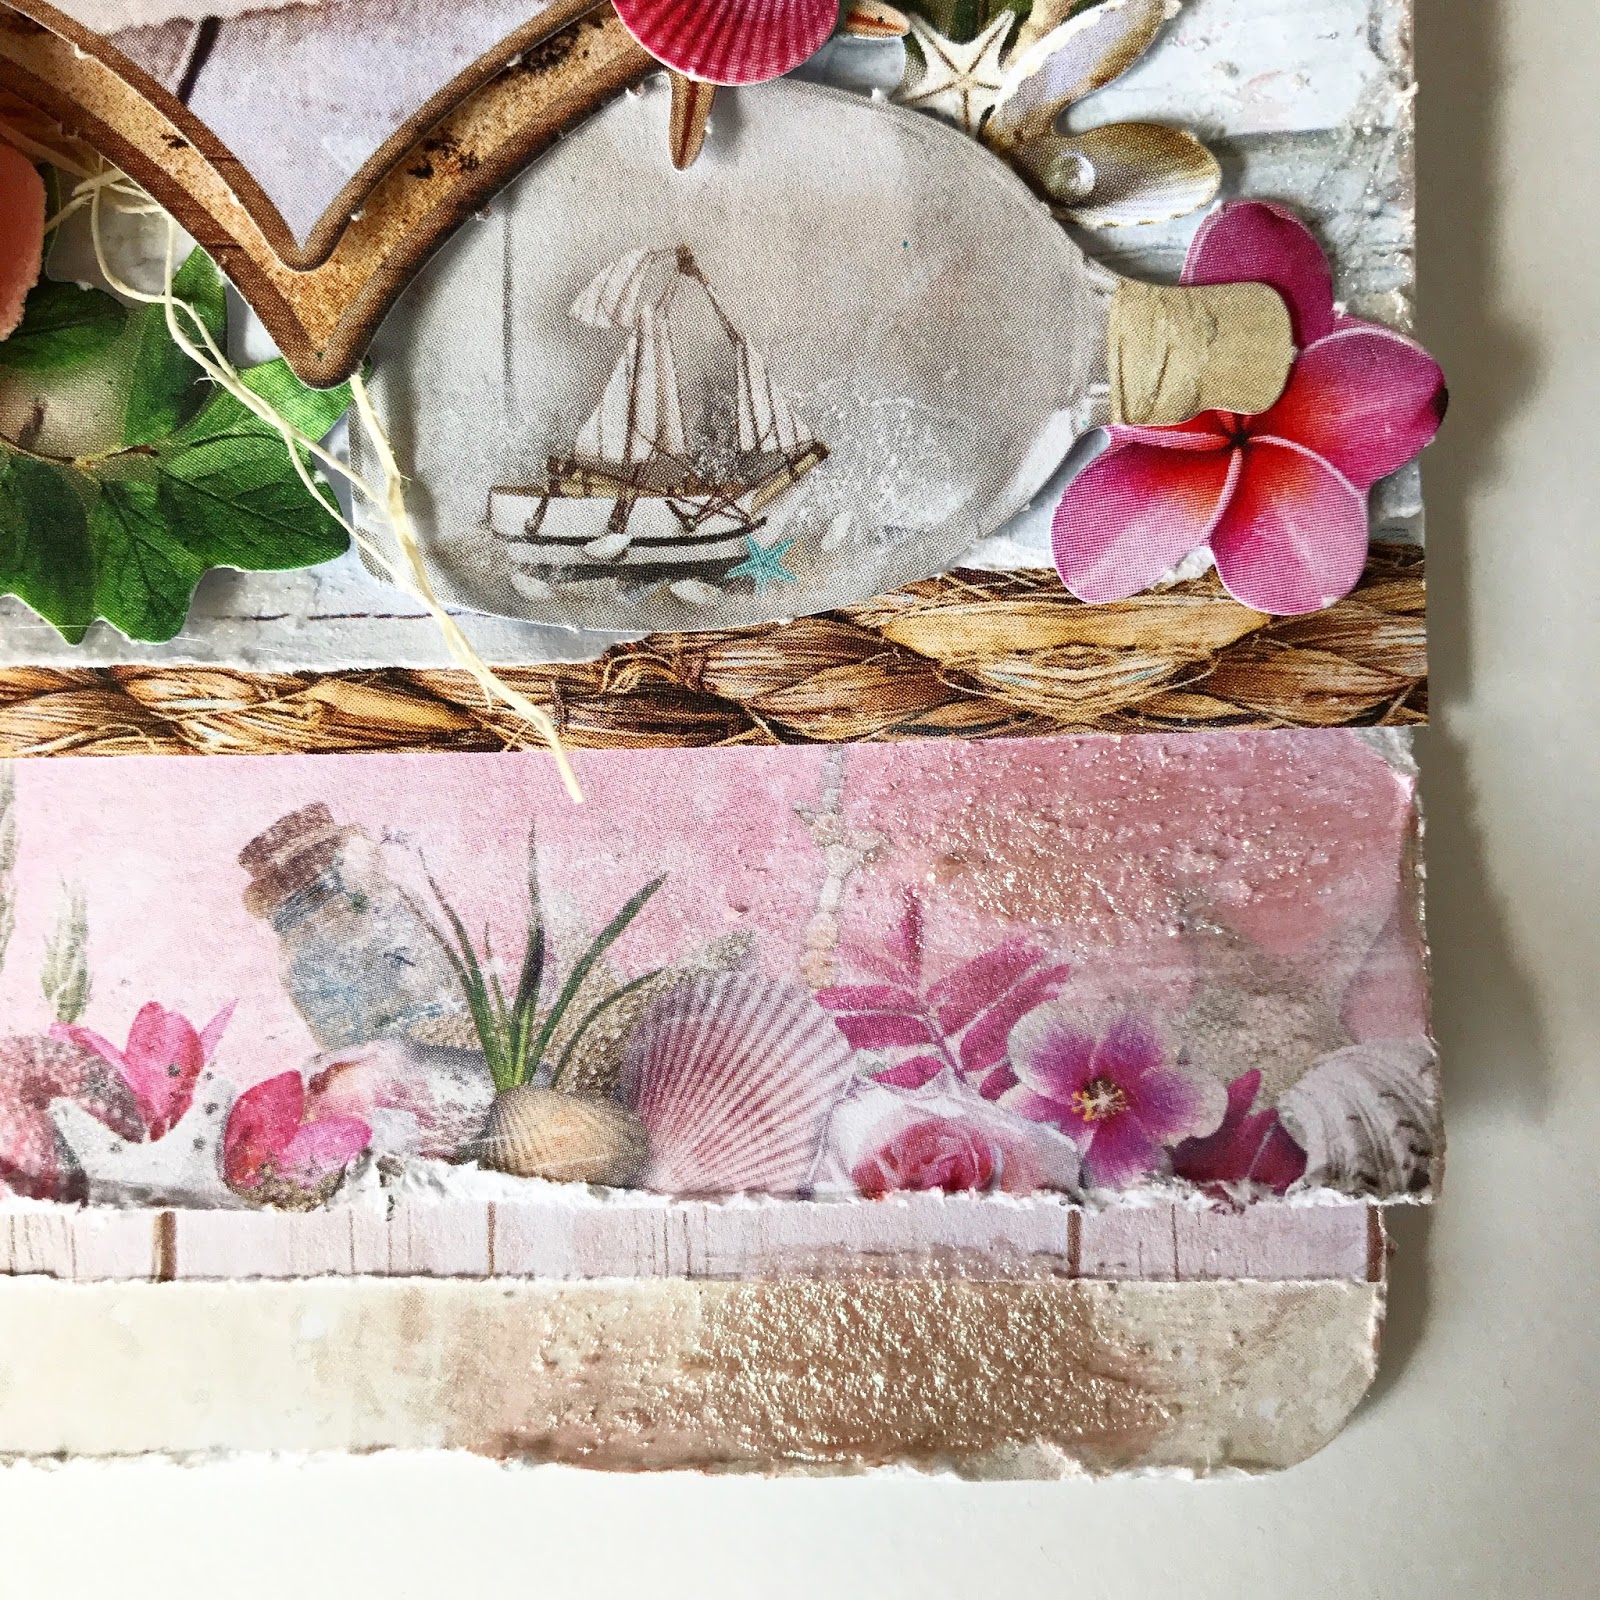
Don't these beach huts look super cute? I had originally planned on using only one, but had to find a way to add another, so I cut the top portion of one and placed it behind some board paper (included in the kit) so it would look like one was peeking in the background. The ideas are endless here, so I added some color matching flowers, and added more blue raffia to match the tag's decor at the top.


The kit has a boatload of accessories, so you can choose to add the seashells and extra ephemera in the kit around the entire tag as you please. For a beach effect I added cheesecloth, which you can find at any food store. 


And here is my finished product. I hope you enjoyed this quick and easy tutorial!

Sunday, June 11, 2017

"Romantic Summer" Birthday Card for Cherish the Memory


"Romantic Summer" 


A birthday card I made using Cherish the Memory's 

3D Romantic Summer Greeting Card Kit


This birthday card is perfect for that summer lovin' beach bunny in your life! But seriously, who doesn't love the beach? I can't think of anything that symbolizes the promise of summer more than a fantastic time getting your feet wet at the beach!

Whether you are gifting a card to a person going away on vacation or who just plans to spend some time to relax in their backyard pool, this card kit is perfect for anyone that enjoys the summer and what it has to bring. The card kit can be used for any occasion, and I chose to use this sentiment, as I know a lot of people with summer birthdays! 

This kit offers so many options that I think it took me longer to choose which layout I liked the best for the card over the time it took me to make the card. That's what's so great about these card kits, that they are so well put and coordinated that it really isn't difficult to put together an amazing looking card, all the while having more than enough options to make a card unique!


Below in these closeups you can see that I have added a bit, but not much of any embellishments, because the paper included in the kit was already vividly detailed. 


Above you can see that the kit comes with a generous amount of paper options to create layers! Along with perforated images to skip any annoying fussy cutting. (My favorite thing about this kit) 


The kit contains an abundance of really cute paper accessories such as this ship in a bottle, so you can make your card as detailed as you wish, or keep it simple and beautiful.


I hope you enjoyed this post! Stay tuned for a future picture tutorial on using this kit for Tags! 

You can purchase the Romantic Summer Greeting Card Kit here:


Thursday, May 18, 2017

"Summer at the Beach" Canvas for Cherish The Memory


Hello and Welcome!  


In this blog post I will be sharing the latest project that I have designed
for 
Cherish the Memory : A Mixed Media Canvas

The Crafting Kit Used: 


I used the Studio Light "Summer at the Beach" Deluxe Crafter's Kit, which can be purchased here.

Making the Canvas


To start my project I used a new primed canvas and a chipboard anchor from my local craft store. The materials needed for this project were mostly basic art supplies such as twine or raffia (which you can get from Cherish the Memory's Etsy shop, texture paste and Acrylic paints. I strongly feel that this project can be recreated by anyone, mainly because I had so much fun creating it, and the only technique I found myself using was just having fun and the rest fell into place.


The Close Ups


Some seashells were added to "nesting spots" on the anchor to create a grounded look against the canvas. Finding seashells on the beach is my most fond memories of summer vacations spent with my parents, so there is much to remember when I used these. 


I used texture paste from Finnabair called "White Crackle" to give the anchor an aged look. Similar texture pasts can be used on the canvas prior to the acrylic to add interest to the background. I sourced my colors from the vibrant blues and greens from the Summer at the Beach kit.


Despite having used a total of two real seashells, the kit contained such a generous amount of paper ones that when used altogether it really made them look incredible and realistic. Having the ones from the kit allowed me to strategically place them in places I otherwise could not have used had I used real ones. Look at those stars! The red starfish were my absolute favorite. They also brought out the red in the lighthouse and really tied the canvas together as the red really popped out against the hues of blue and sea green. 


I love the kit's versatility in choices. I chose to use this ship to give the canvas a more masculine feel.


The kit was full of fun scenes and accessories such as chairs, beach fences, buckets of sea life and lanterns! This kit is definitely friendly for everyone. 


I really enjoy using paper crafting kits, especially when making a mixed media project. The kit was so well organized and matched so beautifully that it took a lot of the guesswork out when creating this mixed media project. In this picture I took a scrap piece of leftover paper and applied it to this canvas, because the color matched the rest of the adornments just perfectly. 

I hope you enjoyed the blog post! Please let me know what you think and if you have any questions or comments!

Here are the links in case you missed them earlier :


 Cherish the Memory Etsy Store


Thursday, May 11, 2017

"Romantic Summer" Tutorial for Cherish the Memory


Hello all!

I am excited to share my first project designed for Cherish the Memory as their design team member! In this post I will be showcasing a step by step photo tutorial using Cherish the Memory's "Romantic Summer 3D DIY Kit to make a dimensional decorative wall hang using a wooden frame. You can purchase the kit here : Romantic 3D Card Kit


Supplies Used:
  1. Wooden Frame, A Wooden Shallow Box or the back of a canvas
  2. Finnabair White Crackle Paste, Gesso or a heavy body white acrylic paint
  3. Seashells and rocks for the ocean floor portion
  4. Raffia for the seaweed that can be purchased here : Raffia
  5. 3D Romantic Summer Card Kit (highly recommended for this project) or any beach themed paper collection with an assortment of sea and beach life graphics
  6. Finnabair Art Stones and Mini Art Stones for Texture
  7. Cheesecloth for ocean mesh 
  8. Finnabair Art Alchemy Acrylic Paint in Blue-Gold, Aqua Rose and Light Patina for the background highlights
  9. Lindys Stamp Gang in Time Travel Teal for background 
  10. Basic Crafting Supplies : Glue Gun, Paint Brush(es), Scissors and a Craft Mat to protect your space.

 Romantic Summer 3D DIY Card Kit


Tutorial


I decided to use the back of a wooden palette type frame that I found in the woodcrafting section of my local craft stores for about $6. You don't have to stick with wood and can use the back of a canvas but the depth won't be as great and the results may differ a tiny bit because of the nature of the surface.


A very light coat of gesso was painted on just enough to prime the surface. This is entirely up to you, I did so to have some of the grain show through.


Here is where I applied some white crackle paste by Finnabair so that the surface would take on an aged look and look as if the paint had started chipping off from years of moisture. You can apply more gesso or use the crackle paste to adhere the Finnabair Art Stones or whatever you choose to use for texture. My goal here was to make the little balls look like barnacles had started attaching to the wood from  years of being by the ocean.


I started applying the acrylic paints to highlight the texture of both the stones and the crackled effect after everything had been dried. 


A close up of the texture


The Raffia and Seashells

The bright blue color here was the last addition in terms of the paint process. I used Lindy's Stamp Gang Spray in "Time Travel Teal". It brought contrast and tied the colors to the Raffia I used from Cherish the Memory. I was very pleased using the raffia because it made a perfect "seaweed". You can achieve this look by taking your glue gun and adhering the ends of a looped handful of Raffia, then cutting the looped part at the top so that the ends are even and tucking them behind and under the seashells. I glue the seashells first and then applied raffia in the corners and any crevices I found but you can apply the Raffia beforehand, just make sure to cover the bases with shells or any other decorative items you may think of using. 


Using the "Romantic Summer DIY Card Kit" 

I cannot express how fun this part was! The kit is so rich with lively colors and beautiful ocean themes that despite my love for painting and altering I must say this was my favorite part. The sky is the limit with this card kit because it was so generous in terms of the different designs, very well worth the price. The kit is perfect for those that love attention to detail like myself!

Here are some close ups of the project:


After completing the project I truly felt like I had just been at the beach. Making projects like these brings me back a flood of memories from past family vacations to the ocean with my parents

I hope you enjoyed this tutorial! Be sure to check out Cherish the Memory on ETSY (link below) and thank you so much for stopping by!

Links

Website : http://www.cherishthememory.co.uk/


Wednesday, March 1, 2017

Welcome!

Thank you for visiting my blog!

I will be using this blog to share and discuss my artwork, in hope to inspire others. I normally only use Instagram to post, but have decided that having a blog would enable me to share more in depth information over process, supplies used and techniques that I have learned along the way of my creative journey.

I have recently discovered mixed media, and am happy to say that I have joined an online mixed media class to learn and explore this new world of creativity! So this blog will be used to showcase the art that will be a result of those classes in addition to other things that I might make with my sewing machine.

The new class is called Imagine {Art Transformations} and is the first online class by Finnabair. You can click the link on the right side of my blog to sign up! I am really excited about this class and hope to share some new artwork with you soon.

P.S. If you'd like to see some of my recent artwork, you can visit my Instagram.

Eugenia 

"Wrapped in Adventure" Layered Card for Cherish the Memory

Layers and Distressing  Using Studio Light's Paper Collection "Memories of Summer" Creating Layers Do you ever ...