Showing posts with label art. Show all posts

Friday, June 29, 2018

"This is all I need" Mixed Media Canvas


A Bright, Deliciously Pink Mixed Media Canvas
for Cherish the Memory 


Hello all! Welcome to my blog!

Today I will be sharing with you this mixed media canvas I have created for Cherish the Memory using Studio Light ephemera available at the shop.

I will start out by saying that out of all the hobbies I have, I love love love making canvases the most! This canvas has taught me that you don't need a lot of paper to create a work of art, just some beautiful ephemera! I will be listing below links to this gorgeous ephemera at the end of the post.


Being Resourceful

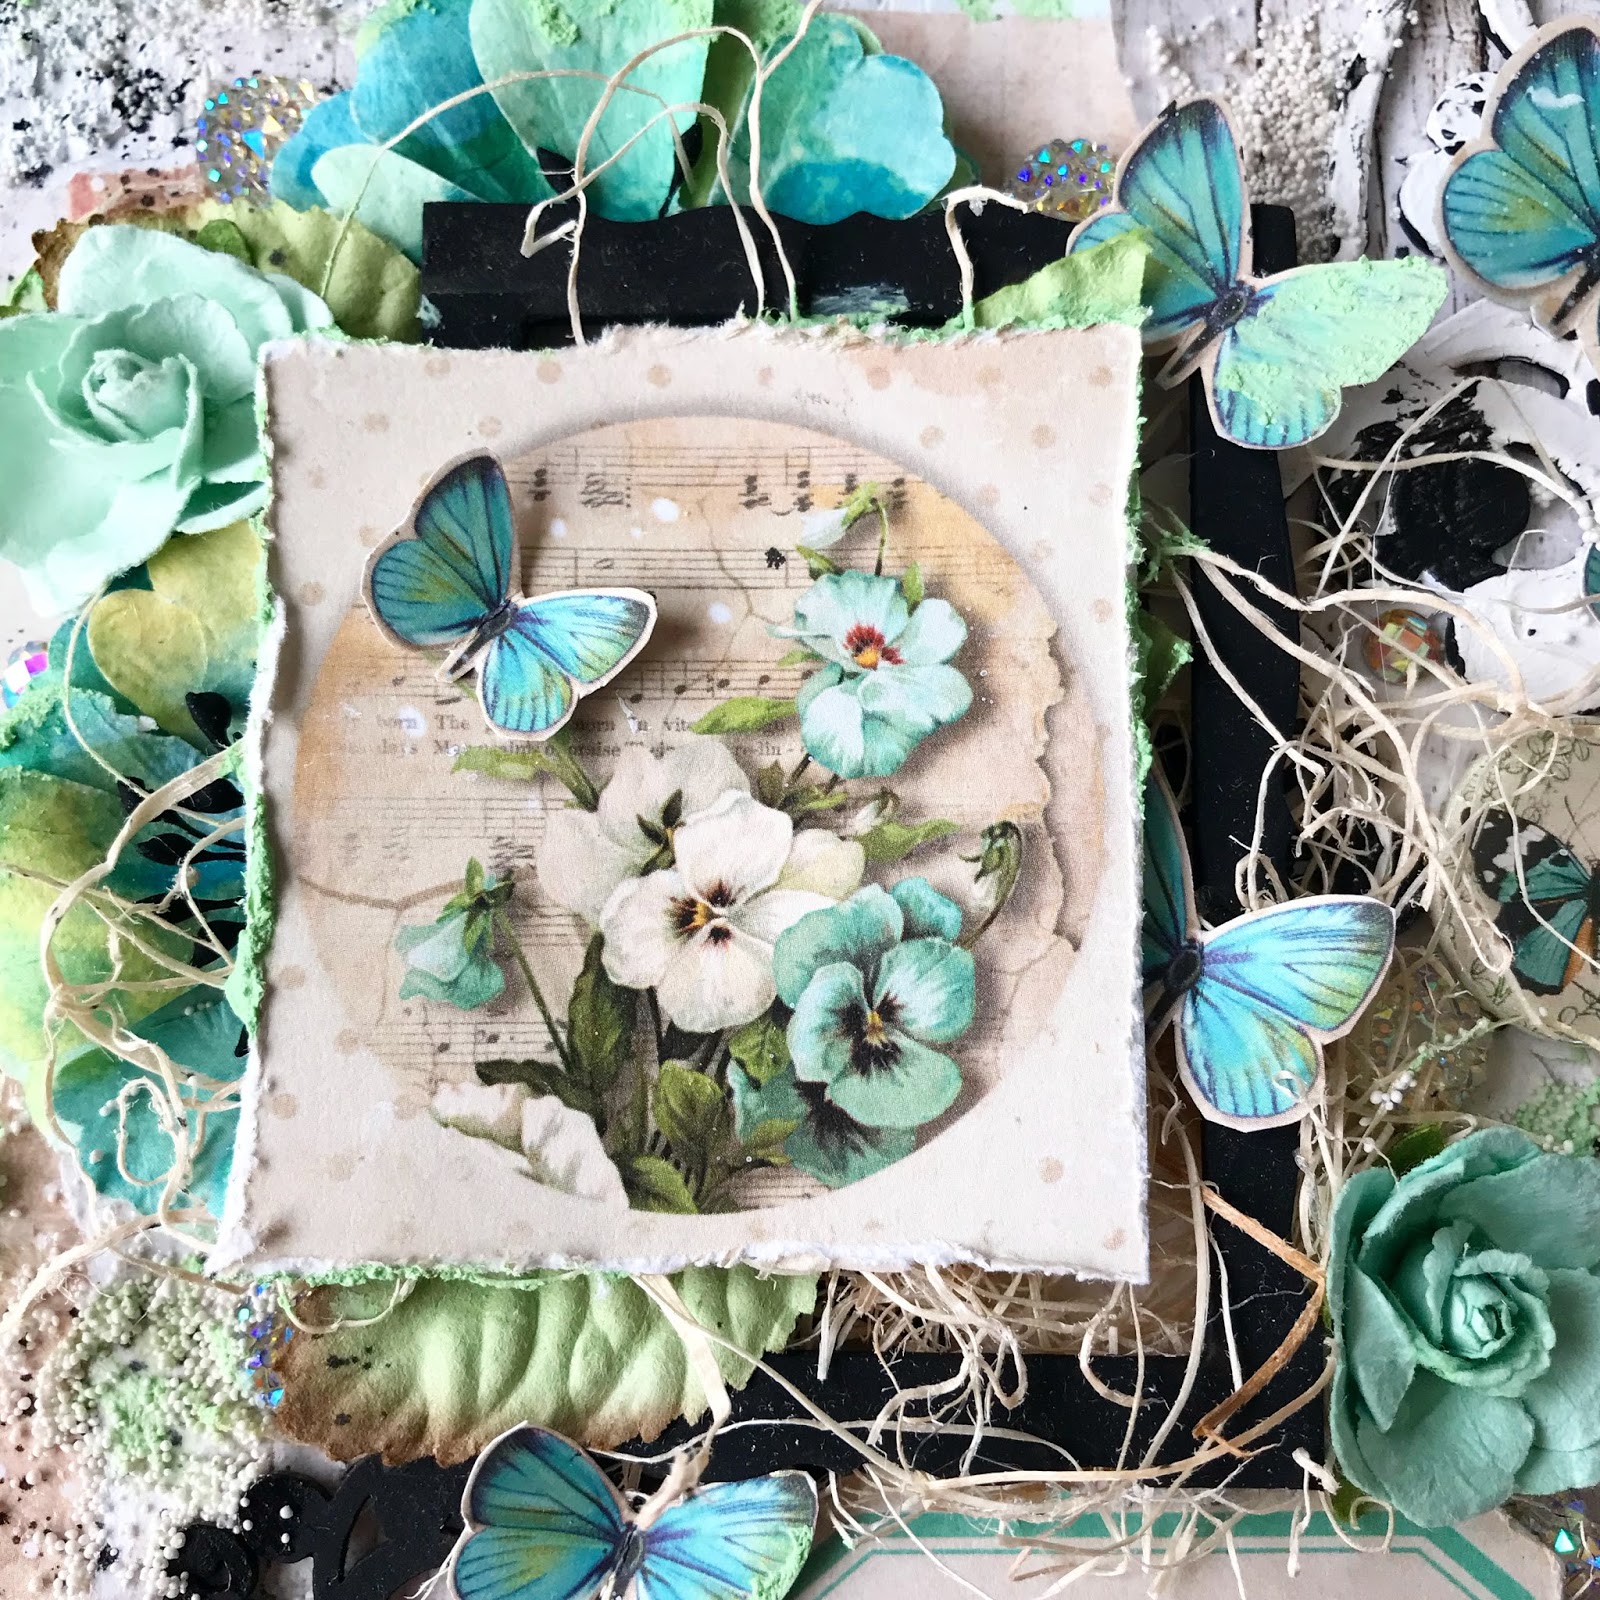
A must in my canvases is texture, the more the better! Experimenting with the combination of textures, whether it is a lot of different textures combined together, balanced, one simple texture, I believe there is no right or wrong. For example, in the background of the canvas I used two different stencils with modeling paste, in addition to art stones, and microbeads!

If you notice, the shapes of textures doesn't stop there, I bring the texture over in layers by adding a layer of mesh and twine. I think it is important to tie the elements in the different layers to each other, so that they all sort of have this relationship and they marry into one another. I like to be cohesive. Speaking being resourceful, can you guess what that mesh is? It isn't store bought, it is mesh that I have repurposed from a laundry bag that was getting tossed out cut up into pieces.


Here you can see the various layers creating dimension. The first layer is texture using stencils and modeling paste. The second layer is paper flowers with recycled mesh and twine. Third layer presents the ephemera. 


To create depth, you can see that I strategically place rhinestones in areas that need interest, like crevices, dark spots that need some light to reflect back to the viewer. I do this last!


I hope you have something to take away from my post and thank you for visiting! Here are the links to the ephemera used in my canvas.

This and more from Studio Light's Memories of Summer available at Cherish the Memory


Thursday, February 8, 2018

Mixed Media Butterfly Canvas for Cherish the Memory


Lemoncraft Vintage Time Mixed Media Canvas

"Great things take Time"


Hello! I am excited to bring you my first post of the new year! It has been a short while since I have last felt like I really "created" anything, so you can say I was more than ready to make this mixed media canvas!

This is my first time working with Lemoncraft papers, which are beautiful Polish papers that you can get from Cherish the Memory Etsy store. The links to the products will be at the end of this post!


The overall layout of the canvas is a rather busy one, so I wanted to make sure that the background stayed light and subtle, so as to not be distracting and remain a background all the while containing just enough color to tie the background with elements of the face of the canvas. 

For the background I used : 

Tim Holtz Stencil
Finnabair Mini Art Stones
Finnabair  Patina Effect Mint-Green Paste
Finnabair Acrylic Paint in Opal Magic "Blue-Gold"
For the splatter effect : Tim Holtz Distress Spray Stain in "Black Soot"


My favorite part of the canvas is this elegant chipboard piece by Creative Embellishments. I used heavy black gesso to give it that beautiful black matte effect. These lovely butterflies were fussy cut from Lemoncraft fussy cut papers which are listed below.


I love Tim Holtz Idea-ology stickers! They are perfect for all mixed media projects, so I love using them in mine. I especially love that they come in black and white, so this black sentiment was perfect for creating the contrast I needed for the black accents in the layout.


I mainly drew inspiration from this lovely flair button for my canvas! I love contrast, and I wanted to marry the black and white beauty of the wings along with the soft warmer browns and creams into the color palette for that vintage look that these papers are styled after.


I used organic fibers to help give dimension to the center frame/piece of the canvas. The chipboard frame received the same treatment as the elegant scroll chipboard, to make the center piece pop and to play along with the black in the pansies. I loved the garden effect the paper flowers and paper leaves had! It made the canvas seem as though it was "sprouting" which is always a good thing, considering I am as far from having a green thumb as possible! :) 


I took a chance on using white crackle paste and white acrylic paint to give this chipboard piece an aged shabby look. I wanted it to look as though time had passed and the "wildlife" had essentially taken over, and luckily I ended up loving it! You MUST take chances.


Love dimension! The more the better! What I love even more are rhinestone embellishments. I love all things sparkly, and they are excellent at creating depth by reflecting light amongst the back layers.


I hope you have enjoyed my post! We are into February now, but I hope you have had a great start to the year already. 


Eugenia Redmond


https://www.etsy.com/listing/589290965/lemoncraft-vintage-time-007-a4?ref=shop_home_active_13


 Fussy Cutting Sheet A4

https://www.etsy.com/listing/573160712/lemoncraft-gossamer-blue-button-and?ref=shop_home_active_13

    https://www.etsy.com/listing/586968773/lemoncraft-6-x-6-gossamer-blue-card?ref=shop_home_active_11

Friday, December 8, 2017

Snow Fox Shaker Card for Cherish the Memory


"Frozen Forest" Paper Kit Shaker Card


I am officially addicted to making shaker cards...and I am so grateful to be designing for Cherish the Memory because after having received these lovely card kits, making shaker cards has been a pure breeze! Honestly, I can't seem to get myself to make a non shaker card these days. I am ALMOST done with finishing my Christmas cards for friends and family, and they have been all...you guessed it...shaker cards!

You can purchase the card kit by clicking on the images to be directed to Cherish the Memory's Etsy 

https://www.etsy.com/listing/542529138/frozen-forest-die-cut-block-for-card?ref=shop_home_active_33

https://www.etsy.com/listing/542529138/frozen-forest-die-cut-block-for-card?ref=shop_home_active_33

As you can see from the picture above, the pages from the card kit come perforated already, so it's too tempting to make these into shaker cards, all you have to do is to grab a circular metal die closest to the size of the image and cut the background provided within the kit, add some foam mounting tape to the back, then add your sequins and done!


Tip: When making shaker cards, adding seed beads not only gives shaker windows a cool effect, but also enhances the sound when you shake it as well as improving the movement of the sequins inside. Seed beads of all colors can be found at your local craft store in the jewelry section. The smaller the smaller the better!


To tie the elements of the card to the silver foiled background, I used some metallic silver embroidery floss and tied an ornamental coordinating die cut leaf from the kit and also to make the letters of "snow" appear to be attached. I used Tonic Nuvo drops and Ranger Liquid pearls for the embellishments.


If you like foiled papers, like myself, you will be love these kits!


I truly hope you've enjoyed my blog post! Any feedback is always greatly appreciated. Look for future YouTube videos in the near future! 


Monday, October 16, 2017

"Royal Christmas" Cards for Cherish the Memory

Three Easy Christmas Cards


Hello, all!
 I will be showcasing three cards made from Studio Light's "Royal Christmas" Foil card kit 
available from Cherish the Memory 


 "The Season filled with joy & love"

I used gold DMC embroidery floss for this card and some white glitter petals from a Prima Marketing flower I had in my stash to add some dimension, but the card kit came with plenty of ephemera to accent the card that nothing more was necessary!


Card #2


"It's the most wonderful time of the year"

To accent this gift box themed card, I used jute cord to match the graphic, plenty of foam tape as I do with most of my cards to bring out the embellishments, and much like the card above, the card kit provides more than enough beautiful gold foiled elements to add to your cards.


Card #3


"Merry Christmas and a Happy New Year"

My favorite characteristic of these card kits, is that each card comes with separate sayings to accommodate different occasions such as using the holiday expressions, and those that specify Christmas so that there is a card for everyone! This card was my most recent card, and the quickest, but also my personal favorite of the three. I can't wait to make the rest of the cards from the kit!


This kit makes card making a simple, stress free breeze! These 3 cards were the fastest cards I have ever made and I am very pleased with how pretty they turned out to be! With the holidays approaching and an upcoming trip to see family, these were perfect to make for friends and family! So, if you are in a time crunch, I highly recommend this kit! I have listed the link to this kit below :


https://www.etsy.com/listing/542888856/royal-christmas-die-cut-block-for-card?ref=shop_home_active_15

Thank you for visiting!

"Wrapped in Adventure" Layered Card for Cherish the Memory

Layers and Distressing  Using Studio Light's Paper Collection "Memories of Summer" Creating Layers Do you ever ...