Showing posts with label mixed media. Show all posts

Friday, June 29, 2018

"This is all I need" Mixed Media Canvas


A Bright, Deliciously Pink Mixed Media Canvas
for Cherish the Memory 


Hello all! Welcome to my blog!

Today I will be sharing with you this mixed media canvas I have created for Cherish the Memory using Studio Light ephemera available at the shop.

I will start out by saying that out of all the hobbies I have, I love love love making canvases the most! This canvas has taught me that you don't need a lot of paper to create a work of art, just some beautiful ephemera! I will be listing below links to this gorgeous ephemera at the end of the post.


Being Resourceful

A must in my canvases is texture, the more the better! Experimenting with the combination of textures, whether it is a lot of different textures combined together, balanced, one simple texture, I believe there is no right or wrong. For example, in the background of the canvas I used two different stencils with modeling paste, in addition to art stones, and microbeads!

If you notice, the shapes of textures doesn't stop there, I bring the texture over in layers by adding a layer of mesh and twine. I think it is important to tie the elements in the different layers to each other, so that they all sort of have this relationship and they marry into one another. I like to be cohesive. Speaking being resourceful, can you guess what that mesh is? It isn't store bought, it is mesh that I have repurposed from a laundry bag that was getting tossed out cut up into pieces.


Here you can see the various layers creating dimension. The first layer is texture using stencils and modeling paste. The second layer is paper flowers with recycled mesh and twine. Third layer presents the ephemera. 


To create depth, you can see that I strategically place rhinestones in areas that need interest, like crevices, dark spots that need some light to reflect back to the viewer. I do this last!


I hope you have something to take away from my post and thank you for visiting! Here are the links to the ephemera used in my canvas.

This and more from Studio Light's Memories of Summer available at Cherish the Memory


Wednesday, May 9, 2018

Backyard Blossoms "Thinking of you" Card for Heartfelt Creations


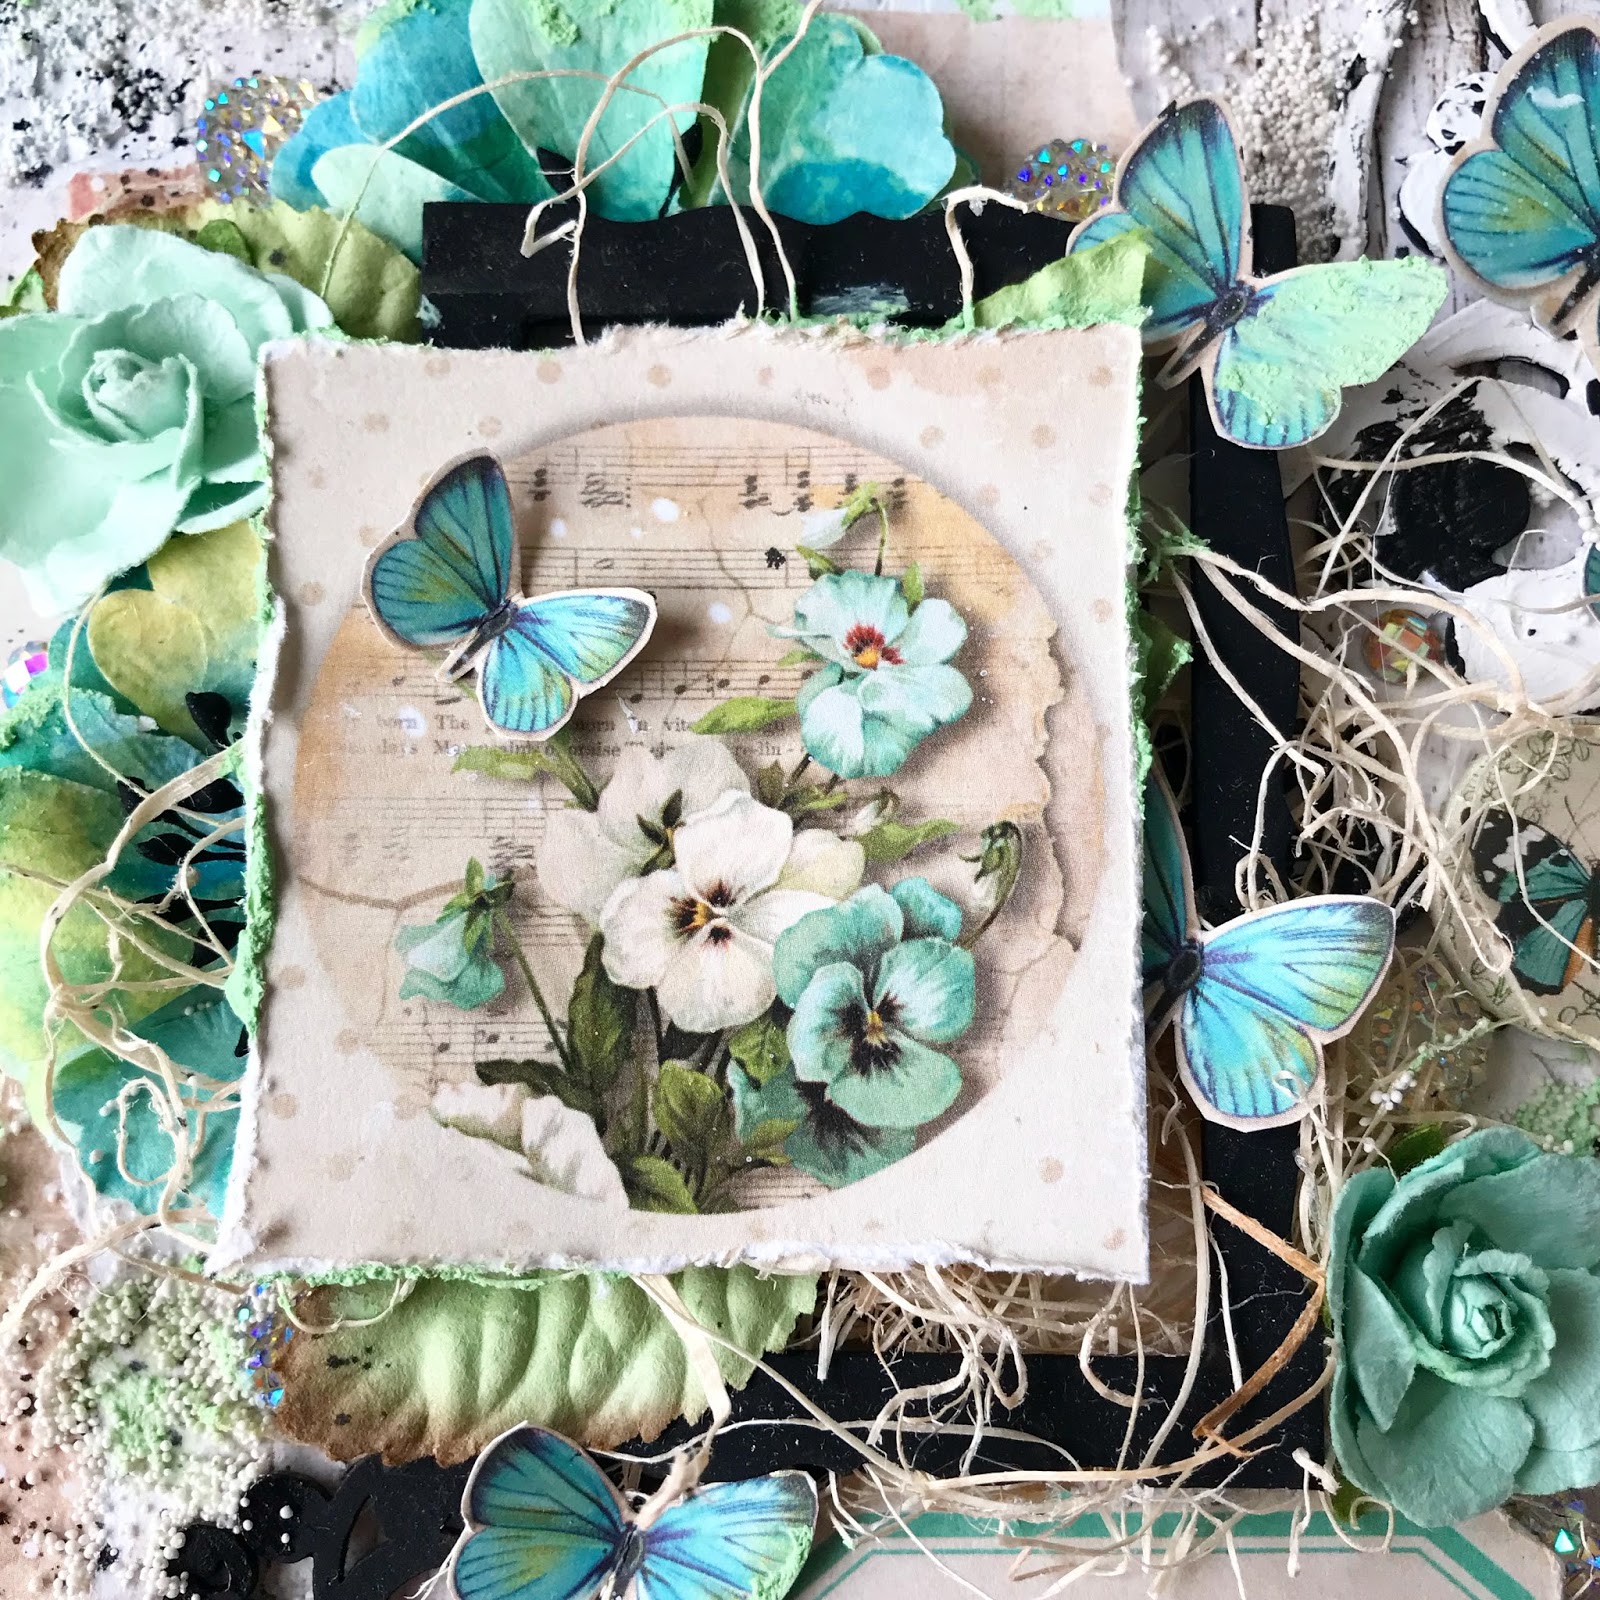
One of the joys in my life is watching my planted flowers, and wildflowers bloom around this time of year! Having the chance to work with the new Backyard Blossoms collection from Heartfelt Creations  was a fun way for me to share this joy with you through my card.  Make this card with the instructions below!


About the Backyard Blossoms Collection

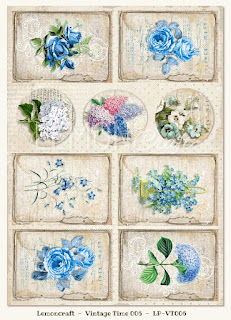
Summer brings with it the excitement of a new gardening season, lounging in the open expanse of the backyard and enjoying the beauty of favorite perennial blossoms dancing gently in the warm summer breeze! Among those returning favorites are the attractive, butterfly loving coneflower! Bright and colorful, these pretty flowers come dressed in a wide variety of hues and quietly display their domed centers and soft delicate petals against the backdrops of ornamental grasses and other decorative backyard plantings! Come along with us as we welcome back the summer season with a walk through the Backyard Blossoms Collection by Heartfelt Creations! Brilliantly hued, and filled with a good dose of summer sunshine, the fabulous paper collection showcases happy shades of bright yellows, pretty pinks, luscious lavenders and glorious greens and showcases lovely lace like patterns, elegant swirls and bountiful coneflower blossoms! Included in this jubilant and cheerful assembling are three exquisitely illustrated cling stamps sets with coordinating dies ideal for all of your summer themed paper craft creations! From large coneflower images, ornamental grasses, to smaller backyard blossom accents, these dynamic illustrations are ideal for creating your very own dimensional flower gardens as focal points on card fronts or as accents on scrapbook layouts! So grab your lounge chair, slather on the sunscreen and join us as we kick back and relax in the backyard enjoying our favorite backyard blossoms!


Materials and Supplies Used:

Black Archival Ink,Black Cardstock, White Cardstock, Black Satin Ribbon, Natural Excelsior, Glitter, Dimensional Foam Tape, Clear Adhesive, Double Sided Tape, Score Board, Paper Trimmer, Scissors. Kuretake Zig Clean Color Real Brush Markers : No.043 Olive Green, No.041 Light Green, No.025 Pink, No.202 Peach Pink, No.061 Light Brown, No.052 Bright Yellow, No.050 Yellow, Wink of Stella Clear, Distress Tool.

Video Tutorial!

For more tips on creating with the Backyard Blossoms collection, watch the tutorial at https://youtu.be/swO34-n1HNc.


Instructions:

Cut and score a 6x6 card and a 6x6 card base out of black cardstock. Take the 6x6 background from the Backyard Blossoms Paper pad and trim the background down to a 5 ⅞ X 5 ⅞  inch square. Lightly distress the edges with scissors, or a distress tool. Use the concave die from the Decorative Medallion set and die cut the left side of the background paper. Using the same die, die cut from a separate piece of black cardstock and set aside to be later adhered.

Using the tag die from the Luggage and Tags Die set, die cut the matching background tag found in the Backyard Blossoms Paper Pad. Fold a strand of ribbon in half and loop through the hole in the tag and pull through. Cut off any excess ribbon leaving about 2 inches and set aside. Using the ticket die, die cut the yellow “Thinking of you” sentiment ticket from the Backyard Blossoms Paper Pad and set aside.

Using black Archival Ink, stamp and die cut two single coneflowers from the Garden’s Edge Coneflower set (1.75”x 2.5”) and two leafy accents (2.25” x 3”) from the same set. Stamp and die cut the smaller coneflower from the Blossoming Coneflower Set. Color as desired or use the above suggested Zig colors.

Take the 5 ⅞ x 5 ⅞ background paper from the paper pad and adhere it to the 6x6 black cardstock base without adhering the inner die cut details. Take the black cardstock Decorative Medallion die cut and adhere along the right side of the card (mirrored against the left side) without adhering the intricate details by only gluing the side. Take one of the leafy accents and tuck the bottom stems in between the background paper and the black cardstock base on the left side behind the die cut details to make it appear as if the plant is growing from the background through to the front of the paper to the left of the middle and adhere. Repeat the same step with the  other leafy accent on the right side of the middle of the card, about an inch away from the right edge of the card tucked behind the black cardstock Decorative Medallion die cut.

Take the matching background tag and adhere dimensional foam mounting tape to the back. Take one of the Garden’s edge coneflower and position it on the middle left side of the card and adhere before adhering the tag on top of it so that it looks like it is growing from behind the tag. Add the tag. Add foam mounting tape to the head of the flower to prop it up against the die cut background. Take the flower from the Blossoming Coneflower set and place foam mounting tape to all three flower heads and adhere it on the top of the tag across the center leaving the bottom stem behind the tag. Then, take the last Garden’s edge coneflower, apply foam tape to the back of the flower head and adhere the head to the bottom right corner of the tag. Tuck the stem of the last Garden’s edge coneflower so that it looks like it is growing from behind the black cardstock Decorative Medallion die cut. Take the “Thinking of you” sentiment and place it by  the middle right side of the card on top of the Decorative Medallion die cut and take a leafy accent stem and overlap it before adhering it down for a 3D effect.

It is safe now to glue down any intricate details from the Decorative Medallion die cuts that may be sticking up. Take a few strands of excelsior, fold in half and twist the bottom to form a tiny bushel and add glue to the ends. Do this twice, for each side of the tag and tuck using a chopstick or other tool behind the flower heads, stems, or wherever desired. Add glitter to the flower petals or wherever you want shine. Lastly, place four dots of Ebony black Nuvo Crystal Drops to each corner of the card and allow to dry for at least 12 hours. Enjoy!


Thank you so much for visiting! Please come back for more tutorials!

Thursday, April 5, 2018

"Bloom and Grow" Mixed Media Class at Engage, A Creative Retreat!

 My upcoming Mixed Media Canvas Class


 I will be teaching how to make this canvas, along with making kits available for purchase to make at home. My class will be offered at an incredibly gorgeous retreat out in Dripping Springs, Texas! 


Click the logo to be taken to the retreat website for more upcoming date information, booking or stay tuned by subscribing to my blog!

In this class you will learn mixed media techniques on creating all of my favorites : texture, dimension and creating focal points.


Learn how to add detail, adding composition and more!


Thursday, February 22, 2018

Shabby Chic "Make today count" Mixed Media Tag

"Make today count" Mixed Media Tag

for Cherish the Memory


Using Lemoncraft's House of Roses Collection


"Make today count"


That is essentially everyone's goal, on a daily basis, right? Most of us may feel like we don't succeed in making every single day "count" but I think it's safe to say that most of us try. I like to think that every day counts, no matter what, even if we can't see how. I also think "make today count" means we should take some time every day to take a look around at the beauty in our surroundings, and I think this tag full of pretty flowers and butterflies is a great reminder to do that! This wonderful sentiment is a Tim Holtz sticker.

The House of Roses collection by Lemoncraft Papers is perfect for any lover of shabby chic! If you'd like to make this tag, the collection is available at Cherish the Memory store. I will list the links to the items at the end of my blog post.


The collection has a beautiful vintage theme, which is made up of soft shades of pink, creams, browns and greens. To showcase the softness of these colors, I decided to use black elements for contrast. To make these classic vintage colors pop, I added a cute black chipboard window frame by Creative Embellishments and used a black tag. If you don't have a black tag on hand, you can always use black cardstock paper to glue onto the tag, and make your tag thicker for more durability.


To tie the design of this retro polka dot pink background, I used a Fiskars punch called "Romantique" to make the edges match the style and soften the edges. Consider checking this punch out, it has three different edges and they are all gorgeous. I use it frequently! 

How I gave the tag texture


Background Elements


Do you see that lovely flair button? I am new to working with flair buttons and I LOVE them. They give such a new to me dimension and enhances the layers! 

To give the flowers an organic effect, I like to add materials that look like fine straw and twine. I find that using these materials helps to "fluffen" up the texture and give great dimension! Adding natural elements to any floral project really adds a realistic factor without having to go dig up anything in your garden! I personally don't have a garden, but I do own some English rose shrubs that may or may not have been such a great idea to grow here in Texas, since I can't stand to be outside most of the year. Oops.


Texture Materials : 


Ranger Glossy Accents
Nuvo Drops
Finnabair art ingredients Mini Art Stones
Faber Castell Glass Bead Glitter Gel
Pink Glitter 
Clear Gesso/Clear Gel Medium

Texture Instructions

For this tag, I wanted to create subtle texture that would connect all the elements in the tag, but not become heavy or distracting. The background is very easy to create, just apply a coat of clear gesso or clear gel medium to the background paper and allow to dry first. Take a palette knife or a spatula, then, spread the Faber Castell Bead Glitter Gel on a craft/glass mat and mix by sprinkling glitter and Mini Art stones at your own preference and apply to the desired areas. 

Tip : Use Ranger Glossy Accents to create dew drops on flowers


I hope you have enjoyed my post! Thank you so much for stopping by. I have linked the paper I used below. 


Thursday, February 15, 2018

"Gossamer Blue" Hydrangea and Roses Card using Lemoncraft Papers

 Hydrangea and Roses card for Cherish the Memory

With Tips to keep in mind while working with vintage inspired paper


Hello there! 

When I am not working on mixed media canvases, or playing with paints and inks in my art journal, it is nice for me to turn to card making. Card making allows me to use paper mainly as the main medium, versus the usual mediums I use for mixed media, all the while allowing me to still make them mixed media! I find that to be a wonderful thing because I get bored easily. I like to think that I have crafting ADD. Do you ever feel that way? 

This card was made using Lemoncraft papers, from the Gossamer Blue collection, and if you also love vintage graphics, you'll love this collection! This paper pad from Cherish the Memory has beautiful shades of blue, with varying hues! 


The Lemoncraft paper for images to die cut/fussy were my favorite. I used a spellbinders die to cut this pretty hydrangea from it's rectangular scroll design, which was perfect as it was, but I wanted to create a border that would complement it's surroundings on the card. 


Here you can see the different hues of blue that the paper collection has! The blues vary in range from a deep ocean blue, to a light sky blue with tints of teal. Natural jute twine was used to connect the sepia tones of the vintage inspired background of the hydrangea (there is a lot of beautiful old text backgrounds in the paper pack) to the rest of the card. Balance of color is very important to me to tie (no pun intended) it all together!


Tips to creating an aged look for when working with vintage inspired paper :

  • Use a distress tool to rough up the edges of the paper. I use a distress tool by Prima Marketing but you can also distress paper by using the side of the blade on a large pair of scissors, as long as you are careful.
  • For corners it's a wonderful idea to get yourself a decorative corner punch. The one I used for this card is the Fiskar's corner punch called "Romantique" and I love it!
  • When making a mixed media card, or anything vintage inspired, I love to throw antiquated looking lace in off white and cream colors. The lace I used here creates depth and complements the jute twine. Doilies are great too if you have them!
  • When working with vintage inspired papers, especially with sepia and warm tones, it is best to stick with off white shades and creams. Ivory is a good replacement for white. Personally, I love to use ivory pearls!


At first, I wasn't so sure about using the jute twine in combination with the satin ribbon, but I thought, "Why not?" went for it and loved it! No rules in art I always say! Which pretty much goes against just about everything I was taught in graphic design back in my college days :) The ribbon helps create the illusion that it is holding the blue roses together in a bunch, and the jute twine can be seen as the adornment filler for the roses or simply what attaches the image to the roses. All in the details.


For the background, I used a TCW stencil with wording to play along with the text in the paper by using modeling paste for texture. There are many mixed media details that can be subtle and soft, perfect for card making for adding interest, a blog post might be in order for that! 

The light blue specks you see on the main background paper (the distressed one) I created by using a Lindy's Stamp Gang spray called Tilt-o-Wheel Teal to match the foreground paper and tie everything together. When I did this, I made sure to cover the main image with a piece of scrap paper for masking it away from the speckles.


I hope you enjoyed this post and have gotten some new tips for yourself, or simply some inspiration! Let me know in the comments if you have any questions or would like to read about something not being discussed. Thank you! Please subscribe to my blog if you'd like to be updated for new posts which happen about 2-3 times a month. 

Links to some of the goodies used! Click on the pictures to see specific items.

 Flair Button

 Fussy Cut Page

 Gossamer Blue Paper Pad

 Fussy Cut Page


Thursday, February 8, 2018

Mixed Media Butterfly Canvas for Cherish the Memory


Lemoncraft Vintage Time Mixed Media Canvas

"Great things take Time"


Hello! I am excited to bring you my first post of the new year! It has been a short while since I have last felt like I really "created" anything, so you can say I was more than ready to make this mixed media canvas!

This is my first time working with Lemoncraft papers, which are beautiful Polish papers that you can get from Cherish the Memory Etsy store. The links to the products will be at the end of this post!


The overall layout of the canvas is a rather busy one, so I wanted to make sure that the background stayed light and subtle, so as to not be distracting and remain a background all the while containing just enough color to tie the background with elements of the face of the canvas. 

For the background I used : 

Tim Holtz Stencil
Finnabair Mini Art Stones
Finnabair  Patina Effect Mint-Green Paste
Finnabair Acrylic Paint in Opal Magic "Blue-Gold"
For the splatter effect : Tim Holtz Distress Spray Stain in "Black Soot"


My favorite part of the canvas is this elegant chipboard piece by Creative Embellishments. I used heavy black gesso to give it that beautiful black matte effect. These lovely butterflies were fussy cut from Lemoncraft fussy cut papers which are listed below.


I love Tim Holtz Idea-ology stickers! They are perfect for all mixed media projects, so I love using them in mine. I especially love that they come in black and white, so this black sentiment was perfect for creating the contrast I needed for the black accents in the layout.


I mainly drew inspiration from this lovely flair button for my canvas! I love contrast, and I wanted to marry the black and white beauty of the wings along with the soft warmer browns and creams into the color palette for that vintage look that these papers are styled after.


I used organic fibers to help give dimension to the center frame/piece of the canvas. The chipboard frame received the same treatment as the elegant scroll chipboard, to make the center piece pop and to play along with the black in the pansies. I loved the garden effect the paper flowers and paper leaves had! It made the canvas seem as though it was "sprouting" which is always a good thing, considering I am as far from having a green thumb as possible! :) 


I took a chance on using white crackle paste and white acrylic paint to give this chipboard piece an aged shabby look. I wanted it to look as though time had passed and the "wildlife" had essentially taken over, and luckily I ended up loving it! You MUST take chances.


Love dimension! The more the better! What I love even more are rhinestone embellishments. I love all things sparkly, and they are excellent at creating depth by reflecting light amongst the back layers.


I hope you have enjoyed my post! We are into February now, but I hope you have had a great start to the year already. 


Eugenia Redmond


https://www.etsy.com/listing/589290965/lemoncraft-vintage-time-007-a4?ref=shop_home_active_13


 Fussy Cutting Sheet A4

https://www.etsy.com/listing/573160712/lemoncraft-gossamer-blue-button-and?ref=shop_home_active_13

    https://www.etsy.com/listing/586968773/lemoncraft-6-x-6-gossamer-blue-card?ref=shop_home_active_11

"Wrapped in Adventure" Layered Card for Cherish the Memory

Layers and Distressing  Using Studio Light's Paper Collection "Memories of Summer" Creating Layers Do you ever ...