Showing posts with label Creative Embellishments. Show all posts

Friday, June 22, 2018

Adventures in Travel Card for Cherish the Memory

"Adventure" Mixed Media Card using "Memories of Summer" Studio Light Paper Collection


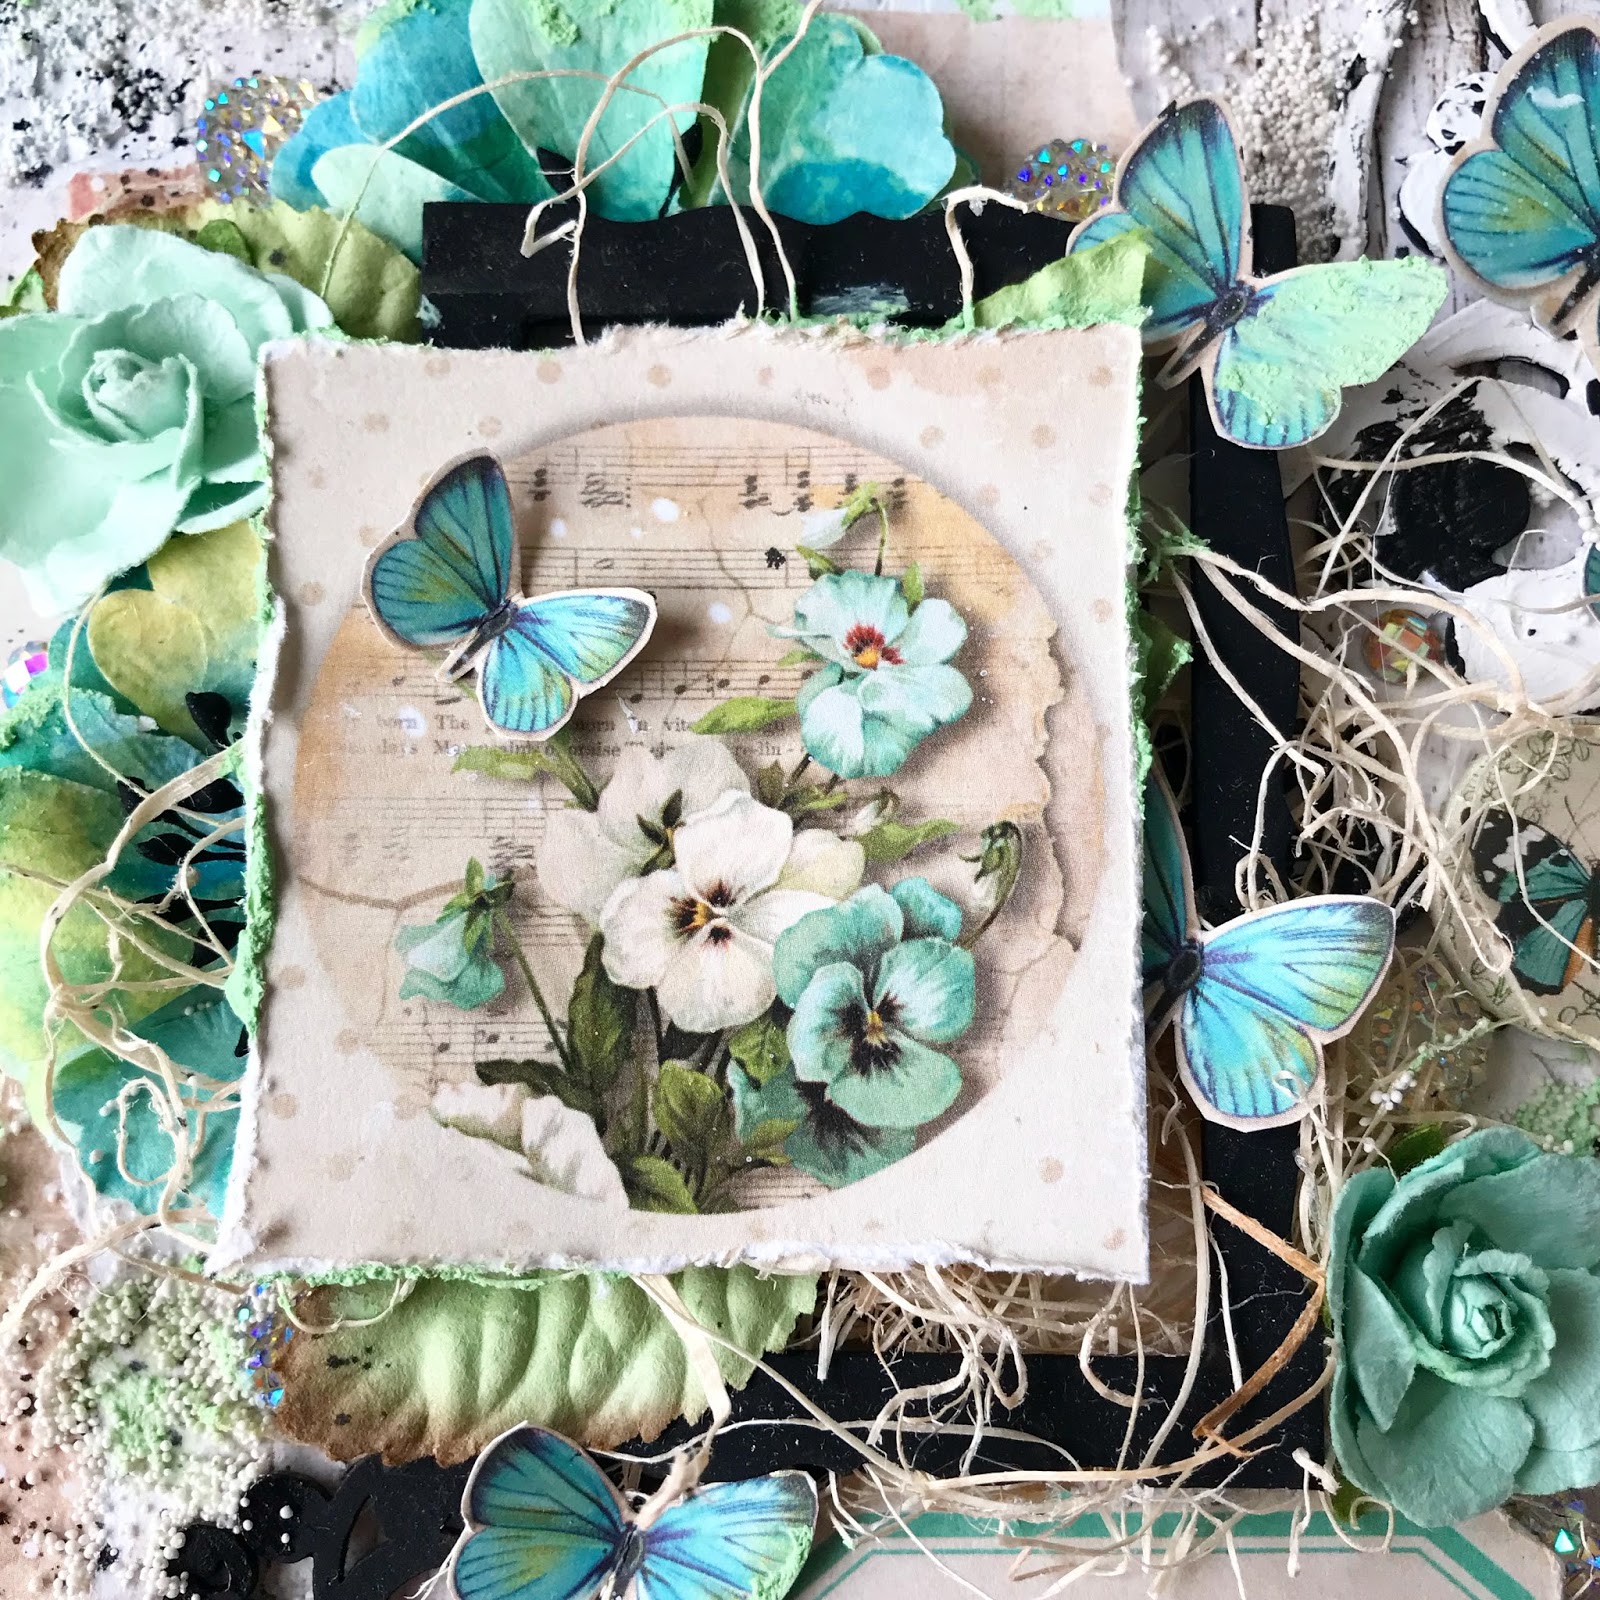
It's that time of year where everyone is happy that it's Summer because they are either going on vacation or they're simply happy that school it out! Whatever people choose to do, it's usually a given that most people relax and have fun. This card illustrates the wonder of travel by using Studio Light's "Memories of Summer" Collection available at Cherish the Memory store

Below are image links to the Studio Light products I have used to create this card :


How to make this card


As you can see, this collection is a pre-cut treasure trove of ephemera, which really makes cards using Studio Light paper really easy! I like to however, convert anything I can into mixed media so I used a combination of different styles of texture embellishments.


For the materials and embellishments I used :

Ranger Glossy Accents
Mini Prills by USArtQuest
Rhinestones
Faber Castell Glitter Glass 
Jute Twine
Cheesecloth
Nuvo Crystal Drops in Ebony
Prima Marketing Paper Flower
Recollections by Michael's Butterfly
Ranger Archival Ink in Tree Branch
BoBunny Text Stamp
Fiskars Corner Punch in Romantique
Prima Marketing Paper Distress Tool
Black Cardstock


Steps:

1. Create a 6x6 card using black cardstock. Take your paper of choice from the "Summer Memories" Paper pad, distress the edges and corner punch as desired and adhere.
2. Stamp the background using your favorite text stamp and your preferred ink color, making sure it matches the overall color theme of your card.
3. On the left side of the card or wherever your focus will be, use adhere down cheesecloth as the base of your embellishments and ephemera.
4. Adhere with a strong adhesive your chipboard and use it as a frame so as to guide your layering choices with the ephemera you are to use.
5. After adhering the major paper ephemera pieces, choose the locations of your bigger embellishments such as any paper flowers or butterflies.
6. Adhere twine or string of choice to create a tie between the ephemera and the background of  the card.
7. Adhere down your rhinestones. I like to use rhinestones in dark corners to add a pop of interest and brightness.
8. After you are content with the placement of everything you can add the wet embellishments that need to dry.
9. Let card dry and enjoy!


Thank you so much for visiting my blog! I hope you have enjoyed the mini tutorial!


Thursday, February 8, 2018

Mixed Media Butterfly Canvas for Cherish the Memory


Lemoncraft Vintage Time Mixed Media Canvas

"Great things take Time"


Hello! I am excited to bring you my first post of the new year! It has been a short while since I have last felt like I really "created" anything, so you can say I was more than ready to make this mixed media canvas!

This is my first time working with Lemoncraft papers, which are beautiful Polish papers that you can get from Cherish the Memory Etsy store. The links to the products will be at the end of this post!


The overall layout of the canvas is a rather busy one, so I wanted to make sure that the background stayed light and subtle, so as to not be distracting and remain a background all the while containing just enough color to tie the background with elements of the face of the canvas. 

For the background I used : 

Tim Holtz Stencil
Finnabair Mini Art Stones
Finnabair  Patina Effect Mint-Green Paste
Finnabair Acrylic Paint in Opal Magic "Blue-Gold"
For the splatter effect : Tim Holtz Distress Spray Stain in "Black Soot"


My favorite part of the canvas is this elegant chipboard piece by Creative Embellishments. I used heavy black gesso to give it that beautiful black matte effect. These lovely butterflies were fussy cut from Lemoncraft fussy cut papers which are listed below.


I love Tim Holtz Idea-ology stickers! They are perfect for all mixed media projects, so I love using them in mine. I especially love that they come in black and white, so this black sentiment was perfect for creating the contrast I needed for the black accents in the layout.


I mainly drew inspiration from this lovely flair button for my canvas! I love contrast, and I wanted to marry the black and white beauty of the wings along with the soft warmer browns and creams into the color palette for that vintage look that these papers are styled after.


I used organic fibers to help give dimension to the center frame/piece of the canvas. The chipboard frame received the same treatment as the elegant scroll chipboard, to make the center piece pop and to play along with the black in the pansies. I loved the garden effect the paper flowers and paper leaves had! It made the canvas seem as though it was "sprouting" which is always a good thing, considering I am as far from having a green thumb as possible! :) 


I took a chance on using white crackle paste and white acrylic paint to give this chipboard piece an aged shabby look. I wanted it to look as though time had passed and the "wildlife" had essentially taken over, and luckily I ended up loving it! You MUST take chances.


Love dimension! The more the better! What I love even more are rhinestone embellishments. I love all things sparkly, and they are excellent at creating depth by reflecting light amongst the back layers.


I hope you have enjoyed my post! We are into February now, but I hope you have had a great start to the year already. 


Eugenia Redmond


https://www.etsy.com/listing/589290965/lemoncraft-vintage-time-007-a4?ref=shop_home_active_13


 Fussy Cutting Sheet A4

https://www.etsy.com/listing/573160712/lemoncraft-gossamer-blue-button-and?ref=shop_home_active_13

    https://www.etsy.com/listing/586968773/lemoncraft-6-x-6-gossamer-blue-card?ref=shop_home_active_11

"Wrapped in Adventure" Layered Card for Cherish the Memory

Layers and Distressing  Using Studio Light's Paper Collection "Memories of Summer" Creating Layers Do you ever ...