Monday, October 16, 2017

"Royal Christmas" Cards for Cherish the Memory

Three Easy Christmas Cards


Hello, all!
 I will be showcasing three cards made from Studio Light's "Royal Christmas" Foil card kit 
available from Cherish the Memory 


 "The Season filled with joy & love"

I used gold DMC embroidery floss for this card and some white glitter petals from a Prima Marketing flower I had in my stash to add some dimension, but the card kit came with plenty of ephemera to accent the card that nothing more was necessary!


Card #2


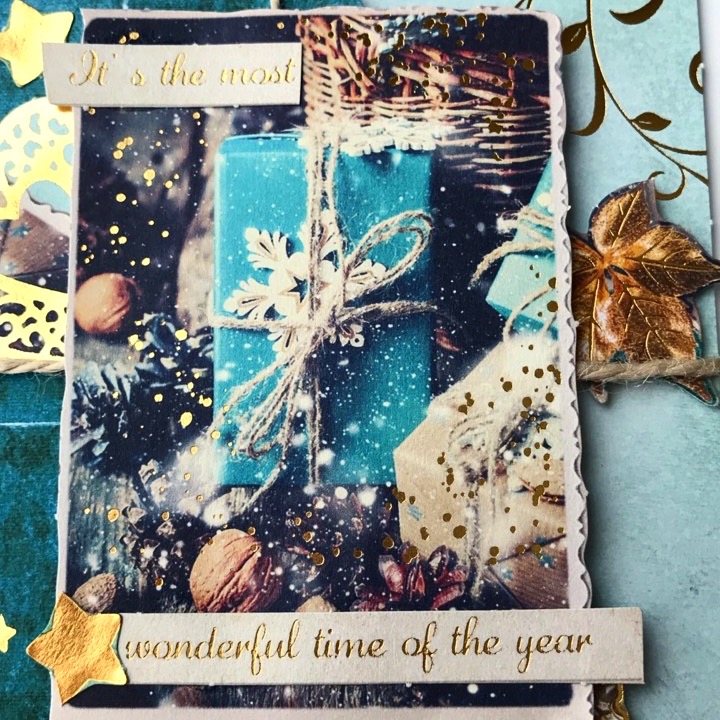
"It's the most wonderful time of the year"

To accent this gift box themed card, I used jute cord to match the graphic, plenty of foam tape as I do with most of my cards to bring out the embellishments, and much like the card above, the card kit provides more than enough beautiful gold foiled elements to add to your cards.



Card #3


"Merry Christmas and a Happy New Year"

My favorite characteristic of these card kits, is that each card comes with separate sayings to accommodate different occasions such as using the holiday expressions, and those that specify Christmas so that there is a card for everyone! This card was my most recent card, and the quickest, but also my personal favorite of the three. I can't wait to make the rest of the cards from the kit!


This kit makes card making a simple, stress free breeze! These 3 cards were the fastest cards I have ever made and I am very pleased with how pretty they turned out to be! With the holidays approaching and an upcoming trip to see family, these were perfect to make for friends and family! So, if you are in a time crunch, I highly recommend this kit! I have listed the link to this kit below :


https://www.etsy.com/listing/542888856/royal-christmas-die-cut-block-for-card?ref=shop_home_active_15

Thank you for visiting!

Wednesday, October 11, 2017

"Sweet Winter : Memories" Fox Shaker Tag for Cherish the Memory

A Foxy Double Shaker Window Tag 


Shake Shake Shake! Shakers are Everywhere!

I had previously made a shaker birthday card for a friend, but it was my first and although I was proud of the way it came out, I still hadn't gotten quite as comfortable as I'd like to be with the shaker technique...so I decided to challenge myself and make a tag presenting two styles of the shaker technique : a background shaker window and a dimensional window.


"Memories"

Sentiments are a great way to get the viewer to gaze at a "starting point." My starting point for this tag, as you can see is the top left corner. I chose this corner for this tag, because I wanted the main shaker window to come at the "end" of the viewing trail for most impact, since it is the second shaker window that is the main attraction.

"First Shaker Window"


Above is the first shaker window right below the sentiment. I took a journaling card from Cherish the Memory Etsy store and used a Spellbinders metal die to cut the window out and reveal the background paper which is from Cherish the Memory Sweet Winter Studio Light Paper Collection. The poinsettia flower is part of the Sweet Winter die cut embellishments that will be listed below.

"Second Shaker Window"


I used a Spellbinders die to create the frame of the second window, to compliment the fox and create a more subtle shaker window, since the fox is the main attraction and the sequins are just barely there in the background giving way to the more heavily embellished, detailed bottom of the tag.

Here are some more pictures of the detail. Enjoy!


I hope you enjoyed checking out my double shaker window tag! I really enjoyed making this tag because it features my favorite animal...a fox! Thank you for stopping by! I will link the products used below available at Cherish the Memory.

Cherish the Memory Etsy Store
(click on the image to checkout the product)

https://www.etsy.com/listing/553274655/studio-light-sweet-winter-season-3d-die?ref=shop_home_active_15

https://www.etsy.com/listing/557719761/studio-light-sweet-winter-project-cards?ref=shop_home_active_13

Saturday, September 30, 2017

Sweet Winter " Winter Wonderland Deer" for Cherish the Memory


Wintry Mixed Media Reverse Canvas


Hello! Thank you for visiting my blog! I have this wintry canvas to share with you featuring this majestic woodland animal. Continue reading for an insight on how it was made and some tips on creating depth and dimension.


I designed this canvas for Cherish the Memory using their gorgeous winter and holiday paper collections. I will list the items I used from Cherish the Memory below in case you are inspired to make a wintry craft project or a Christmas card. Speaking of Christmas cards, I don't know about you, but I plan on making them much earlier than last year, as I waited until November to make them and found myself scrambling on top of handmade gifts.


 As I have stated in my previous posts, these paper kits by Cherish the Memory have made another daunting looking project very easy to make in under a very reasonable amount of time. This canvas took me a short afternoon to make! The thing I love about canvases, is that they are friendly for beginners and serve as a functional home decor item.

As you can see here, the frame looks like fresh snow has fallen on it, but there's never any show where I live, and it's much too soon anyway even if it did snow, so I used Snowflake paste by Finnabair Art Alchemy by Prima Marketing.

I dabbed pink opal acrylic paint around the frame to not only give an accent, but to also help connect the snowy frame with the reds and pinks of the winter scene. It always helps to connect pieces with similar elements to create harmony and create a sense of connection.


Reverse canvases are great for framing scenes. I often imagine it as a "window" that you are looking through into another world. This scene definitely isn't a scene I'd see here in my part of Texas, so it surely is fantastic, and great for getting one into the holiday mood!


Using 3D elements in a reverse canvas is a must as you need to create a bridge between the papered background and the front of the physical frame. Here I used elements that can be found in any craft store in the seasonal decor aisle. Garland that you can cut to size or wreath making accessories are my preferred items as they tend to be on the smaller side and are adjustable, making them very versatile. I used Snowflake Paste on the ornaments, to create that freshly fallen snow effect. If you are going to create that look on the frame, it makes it more believable if the elements used were "snowed" on as well!


I used plenty of elements from the paper packs to tuck in between the layers such as the cute pine cone and winter flowers to help create dimension. Use foam tape to your heart's content, I do and it makes a world of a difference if you love dimension as much as I do. Perhaps that is why I enjoy making these reverse canvases so much! They offer a different level of ability than most card making.

Some close ups: 


Well that wraps up my blog post for today! I hope you enjoyed reading and are leaving with a better sense of using a reverse canvas. Thanks for visiting!


Here are the items from Cherish the Memory Paper Kits that I have used. Click the image to be transported to the listing!

https://www.etsy.com/listing/542529918/christmas-romance-die-cut-block-for-card?ref=shop_home_active_19

https://www.etsy.com/listing/555955331/studio-light-sweet-winter-season-snow?ref=shop_home_active_15

https://www.etsy.com/listing/557714429/studio-light-sweet-winter-season-hello?ref=shop_home_active_12

https://www.etsy.com/listing/542163658/studio-light-sweet-winter-season-snow?ref=shop_home_active_16

Monday, September 25, 2017

"Frozen Forest" Mixed Media Card for Cherish the Memory


A Bushy Tailed and Sparkling Foil 6x6 Card


Snowflakes and Squirrels

Although Fall has just started, it is imperative that anyone who plans on gifting Christmas/Holiday cards this year, start right now! I surely have made the mistake before that the idea of starting cards a month before December was perfectly okay! Hence, though it might seem a little silly (especially when you live in Texas, like myself) it is absolutely necessary to have that extra time so that you can create beautiful, and detailed cards...even if you are creating simple ones, because needless to say, life happens! Luckily, this cute card was created from the Frozen Forest 6 Complete Card Kit from Cherish the Memory which I will link below. 

The great thing about this Frozen Forest Card Kit, was that all the paper embellishments and backgrounds were supplied by the kit. This made making the card an undaunting task. It was nice to find all the matching pine cones and foliage to compliment this cute squirrel enjoying a snack in the snow.

I hope you enjoy these close ups of my card! Read the captions below each image to learn about how the card was made.


The foreground layer is a sheet of vellum with foiled stars. I felt that it was a perfect match to the second base layer which you will see later, has foiled stars on it as well. This is my favorite kit to date, as there is a lot of foil. I love everything sparkling and shining! I adhered clear seed beads using clear medium, and some snowflake paste, both by Finnabair Prima Marketing. The strands are embroidery floss, by DMC in #E5200 and #E168. They are gorgeous metallic strands of silver and white.


I found these snowy white Prima Marketing flowers in my stash, so I decided to embellish them with a gem to make them match the silver theme of the card. The pinecones and leaves are part of the kit, there are many!


I wanted a lot of sparkle, but didn't want to lose contrast, so I incorporated some brown sequins.


I used the snowflake paste throughout the background, so that it would match the wintry scene the squirrel is in. I love adding texture whenever I can, they also helped the sequins and beads look as if they are in the snow.


The stamped "Snowflakes.." image is from the Sweet Winter Season stamp set which is linked below.


The card is super shiny with the added embellishments and foiled paper. It was a challenge to get the lighting to reflect this, so I tilted the viewpoint but the card itself has so much more shine in person. 


I hope you enjoyed my card! Thanks for checking out my post! As stated, here are the items used to make the card : 


You can purchase the kit here : Frozen Forest Kit 


"Wrapped in Adventure" Layered Card for Cherish the Memory

Layers and Distressing  Using Studio Light's Paper Collection "Memories of Summer" Creating Layers Do you ever ...